


How to Digitize Photos ?


You’ve come across some old photos and are delighted with what you found. But there’s a problem: these photos have wear and tear marks. While they might be well preserved, they’re not in perfect condition. Thankfully, trained professionals can take a digital copy of an old photo and restore it to how it originally was or even better. If you want to see what professional restoration experts can achieve with damaged, faded, or torn photos, you can try our photo restoration service . It all starts with creating a digital copy of your physical photo.
To get a digital copy, you’ll have to digitize physical photos yourself; we’ll show you how to do this in this article. After you’ve learned the basics, you can produce a digital copy of your physical photo, which a photo restorer can use. Carry on reading to know more..
What Is the Best Way to Digitize Old Photographs?

When it comes to creating digital copies of old photographs, there are two main options:
- Taking a photo using your phone’s camera
- Using a flatbed scanner
With either of these options, you can create a digital image as a copy of the original. If you want a high-quality, you should go with a flatbed scanner. It is the better option since it produces a much more accurate copy of the photo.
The most common problems in physical photos
Physical photos can have all sorts of problems. Time and improper storage conditions are important degrading factors when preserving the condition of your photos. Cherished memories must be digitized to be preserved in a digital format, restored, and later printed in different formats. You may notice on your old photos the following signs of damage that is a clear indication that they need to be saved from unnecessary damage:
- Tears
- Spillages
- Discoloration
- Bends
When creating digital images, any issues with the photograph will remain. A photo restoration service will remove these problems from the digital copy.
However, in the past, photographers were not as qualified as they are today. Consequently, some photography mistakes may have occurred in your photos, and these may not always be rectified or improved by a photo restorer:
- Reflections
- Shadows
- Poor lighting
- Lack of focus
- Being too close to the subject
- Being too far from the subject
While some reflections can be fixed, some cannot! When a big part of a photo is overexposed, you can do nothing. It is not possible to reveal what is not visible.
Professionals use advanced photo editing software to remove damage and improve the overall look of your photo. They’ll tidy it up, remove imperfections, colorize discolored parts, and much more! They aim to make the digital photo look exactly like the physical one when it was first taken or even better. Professionals follow specific steps for restoring photos to ensure each image is treated correctly. Although most projects rely on the same methods, certain types of damage require different techniques.
If you don’t have a camera phone or scanner, don’t worry. Contact your local print shop, and they should be able to help you. Additionally, you can try searching on Google for photo scanning services to get a map view of the nearby locations that offer such services.
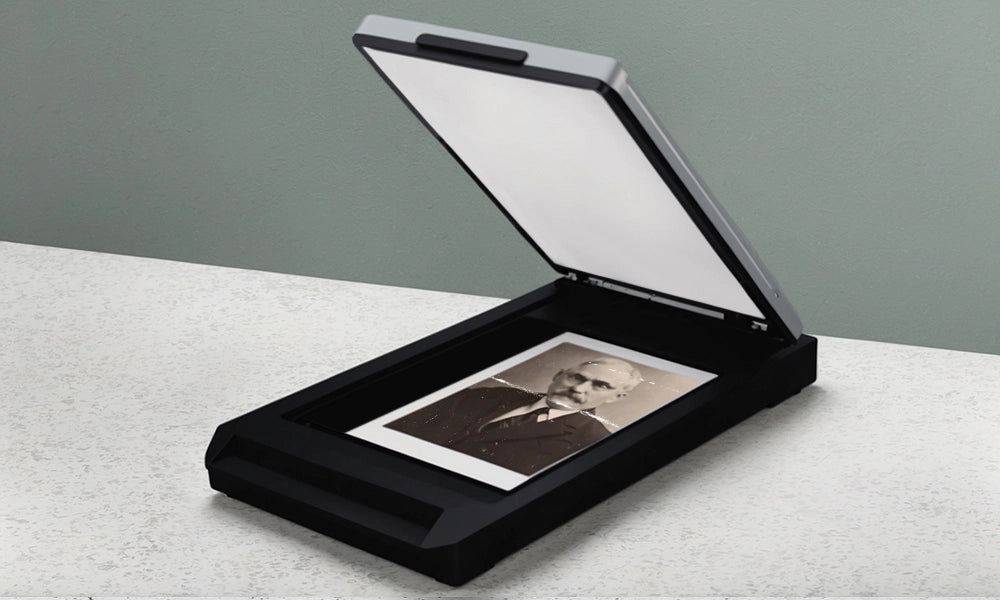
How to Scan and Digitize Old Photos
If you’re going to scan photos, the best equipment is a flatbed scanner. You place your photograph in the scanner and start the photo scan. It then produces a digital copy. It’s different from a document copier; this is for plain black-and-white documents only. If you use a document copier for developed or printed photos, the result will lack quality and resolution. Most likely, they will end up pixelated. On the other hand, a flatbed scanner is better suited for photos because it has a higher DPI.
When going for this option, you can use a photo scanning service or scan photos yourself.
To scan a physical photo, follow the steps below:
1. Obtain a flatbed scanner
You should purchase a brand-new one. If you're low on funds, a second-hand one will do, though it should be in proper working order.
2. Clean the scanner bed
Even the tiniest bits of dust can affect a scan. Before you start, remove fingerprints or dust by gently wiping the bed with a microfiber cloth.
3. Clean the Photograph
For the best result, the photograph should be as clean as possible. As you did with the scanner, give the photograph a good wipe with a microfiber cloth. You can use cotton gloves to avoid getting fingerprints on the photo.
4. Place your printed photo on the scanner bed
Be careful when you do this; you don't want to damage the photo further. Make sure the photograph is properly aligned in one of the corners.
5. Choose the right settings
Find the scanner software on your computer and open it. When scanning old photos, select a high resolution, such as 600 dpi. You should also save the file as a TIFF or any other lossless format.
6. Check the cropping
Look at the digital image preview and check if it's properly aligned; if it's off, you'll have to adjust the cropping and ensure you don't crop into the photo
7. Start the scan
When you're happy with everything, start the scan. You can save the digital photo to your device when it's over.
There are two key benefits to using scanners: quality and accuracy. Because of their precision and powered light source, they can create high-resolution copies with great detail. They’re more reliable than phones because of the output quality they offer. The only downside is the price. These devices can be quite costly, especially the top-end ones.
If you don’t already have a photo scanner, you should be able to find one online or find a scanning service easily enough. Shop around for the best deals, and choose a scanner that produces good results. If you will use the scanner often, consider investing in a professional model. Scanners are ideal if you have lots of photo albums to restore. If you have a small number of photos, you might want to use your scanner, phone, or a local scanning service near you.
How to Digitize Old Photos With Your Phone
The other option is to use your phone. It is a very convenient way of digitizing photos. However, it’s not as simple as taking a photo of your old photograph. There are several things to bear in mind if you’re going to do this well. The list below runs you through digitizing your photos with your phone. It also highlights some key points to consider.
1. Use a phone with a top-quality camera.
New phone models, at most 5 years old, can take great photos!
2. Clean the photograph
Wipe the photograph with a microfiber cloth to get rid of dust.
3. Find a suitable location
Choose a location with natural light. Avoid laying your photo directly in the sun, as it will cause reflections, or your snapshot will be overexposed.
4. Place the photograph on a flat surface
You should ensure the photo itself is flat. If it's curved, it will cause reflections. Put heavy objects such as books on top before placing the photo on a flat surface to flatten in.
5. Get ready to take the photo
For this step, there are three things to bear in mind. First you shouldn't use flash as it can negatively affect the photo. Second, make sure your phone is steady when you take the photo, consider using a tripod or objects to keep your phone in place. Third, check if the photo fills your phone's camera frame but isn't too blurry. Forth, take the photo from above or at a slight angle. Check that the center of the photo is in focus and there aren't any reflections or shadows.
6. Adjust your camera setting if necessary.
Before taking the photo, look closely and see if anything needs adjusting. You might, for example, need to change the exposure so the photo isn't too light or dark. Using a timer will help when using a long exposure or while on a tripod.
7. Take the photo
When you're happy with the result, take the photo. Check it afterwards and take more photos if necessary.
Taking photos with your phone is easier, quicker, and cheaper than taking them with a scanner. However, the downside is that you have to set things up yourself. You have to make sure the photo your phone takes is accurate and free from imperfections.
Some apps work with your phone’s built-in camera. You may want to download the PhotoScan app from Google Play or the App Store. It doesn’t just take a photo of a photo; instead, it creates a scan similar to a flatbed scanner, though the result is lower quality. The Google Photos Scan app is ideal if you want to use your phone without hassle, though at the cost of sacrificing quality.
Is It Better to Scan or Photograph Old Photos?

Ultimately, it’s a matter of personal preference since both options have pros and cons. If you only have a phone and no scanning services nearby, use it to digitize your photos. You might find this option suitable. If not, think about buying a scanner. Yes, it’s an investment, but it does much of the work for you. Plus, it can create better copies of your photographs.
If you have many photographs in your photo collection that you want to restore, that’s great! The more old memories and flashes of time gone by you can restore, the better. Just remember to keep track of your digital files. You should keep them in one place, such as a cloud storage account. Organizing your digital photos doesn’t have to be a challenge.
Whether you scan or photograph old photos, the result should satisfy you. You don’t just have to use the digital copy for photo restoration. It’s yours to do as you see fit. Upload your photos to social media so your friends and family can see them. If they’re personal family photos, send them privately to your nearest and dearest. Everyone you send the photo to can access it as a digital download for personal use, or print it out as a keepsake.
Photos capture the highs and lows of life. They’re like time machines that allow us to remember a particular time and relive memories. Regardless if you take a photo of your photos or use a photo digitizing service, your old photographs can have a new lease of life. Isn’t it great that you can digitize photos and preserve memories forever?